Favorite Blogs


Favorite Stores


Showing posts with label PTU Tutorial. Show all posts
Showing posts with label PTU Tutorial. Show all posts
Monday, October 8, 2018
Through the Forest PTU Tutorial

This tutorial was written by Ashley Zimmerman on 10/8/2018
Any resemblance to any other tutorial is coincidental.
Any resemblance to any other tutorial is coincidental.
Supplies I Used:
PSP – I used 2018 but any version will do
Tube of Choice
Font of Choice
I used Mask_DFly_0032 by Vivienne you can get it here.
Eye Candy 4- Gradient Glow
Optional-
Animation Shop
RebelDezignzAnimation Package 216 by Rebel Dezignz
PSP – I used 2018 but any version will do
Tube of Choice
Font of Choice
I used Mask_DFly_0032 by Vivienne you can get it here.
Eye Candy 4- Gradient Glow
Optional-
Animation Shop
RebelDezignzAnimation Package 216 by Rebel Dezignz
I Used the stunning kit "Through the Forest" by Rebel Dezigns
I used the amazing artwork of Anna Marine (Individual Tube 42-3) here
You can purchase her work and a license from CDO
You must have a license to use Anna's Work.
**Abbreviations I use**
C&P - Copy and Paste
C&P - Copy and Paste
DS- Drop Shadow
RS- Resize
RS- Resize
1.
Open a new image 750 x 750 transparent background
Create new layer - fill with White
2.
Open Frame 2 - RS to 75% - sharpen copy and paste as New layer move slightly over to the left rename Main Frame
Duplicate Main Frame RS 75%
Image - Free Rotate - Right 25 degrees
Rename Side Frame and slide over to the right slightly
3.
Highlight your side frame layer grab your magic wand - selections - modify - expand by 5
Open paper 74 RS by 300 pixels sharpen C&P as New layer under side frame - highlight side frame - selections - invert - select none
4.
Highlight your Main Frame - Grab your magic wand and click inside frame
Selections - Modify - Expand by 5
Open Paper 27 - RS by 400 pixels - sharpen - C&P as New layer move under Main Frame
Highlight frame - selections - invert
Selections select none
5.
Open Raster 1 tube C&P as New layer above main frame- sharpen add DS of choice I used :
V: 5 H: 3 Opacity: 70 Blur: 7 rename Main Tube
6.
Open Merged tube C&P place between the side frame and paper - sharpen rename Side Tube
Highlight Side Frame - Grab your magic wand and click inside the frame

Selections - Modify - Expand by 5
Selections Invert - highlight Side Tube and hit delete - change blend mode to Luminance Legacy
Selections select none
Add DS of choice to Main Frame and Side Frame - I used the same DS as above
7. NOTE
*Drop Shadow I use for my elements below is V: 3 H: 2 Opacity 70 Blur : 7
Apply Drop Shadow to all your elements as we go along unless I state NO DS!*
*If you need help figuring out where the elements are placed you can see my tag for reference!*
8.
Let’s work on the right side under Main Tube Layer —
Open Element 7 RS 45% sharpen place under Main Tube to the right
Open Element 74 - Flip Horizontal - RS 35% sharpen place under Element 7 to the right
Open Element 111 RS 35% sharpen place under element 74 over to the left
Open Element 149 - Free rotate 25 degrees - RS 20 % sharpen place on top of element 7 to the right
Open element 175 RS 20% sharpen place above element 149 place on top of frames
9.
Now let’s work behind the tag !
Open element 135 RS 60% sharpen place in the center slightly to the right behind Frames - NO DS
Open element 129 place below element 135 sharpen
Open element 120 RS 45% sharpen place above element 135 to the right
Open element 46 flip horizontal RS 40% sharpen place under element 120 to the right - NO DS - duplicate and move up slightly so the leaves on the flower are showing (see my tag for reference!)
Open element 94 RS 70% sharpen place above element 135 to the right - erase any bottom part of the element you can see - NO DS
Open element 91 RS 65% dont sharpen! place above element 135 to the left add DS , duplicate - on the duplicate change your blend mode to Burn and then merge down
Open Frame 22 RS 60% sharpen and place below element 129 move it towards the left of your frame and move slightly down so you can see some of it around the edge of your Main Frame - duplicate and move it towards the right of your side frame - no DS on either of these
10.
Now let’s Work above our tag (so right above our Main Tube Layer, it should be your first layer in your Layers Palette!)
Open element 110 RS 20% sharpen move towards the bottom of her dress
Open element 109 RS 30% sharpen paste under element 110 to the left
Open element 96 RS 37 % sharpen paste under element 109 to the left
Open element 39 flip horizontal RS 25% sharpen paste above element 96 to the left
Open element 26 RS 35 % sharpen paste below element 96
Open element 11 RS 30% sharpen place under element 26 and move to the left so the leaf is sticking out at the bottom
Open element 157 RS 25% sharpen place above element 96 and sit the birdie in there
Open element 154 - arrange bring to top - RS 15% sharpen move to the right
Open element 156 RS 20% arrange bring to top move over to the right and stand it on the rocks
Open element 158 RS 20% sharpen move to the left
Open element 137 RS 20% sharpen place below element 11 to the left
Open element 137 again but RS 30% sharpen place below original element slightly to the left
Open element 123 RS 35% sharpen paste right above Main Tube Layer filling in our gap
Open element 127 RS 35% sharpen paste below element 123 and move to the right
Open element 115 RS 30% sharpen place below element 127
Open element 116 RS 30% place below element 115 to the right
Open element 98 RS 25% place above element 110
Open element 58 RS 25% sharpen place above Main Tube Layer to the right
Open element 55 RS 35% sharpen place above element 137 to the left
Open element 45 RS 30% sharpen place above Main Tube Layer to the left
Open element 134 RS 30% sharpen place above Main Tube Layer
Open element 112 RS 50% sharpen place above Main Tube Layer to the right add ds and reduce your opacity to about 30
Open element 97 RS 30% sharpen place above element 112
Open element 71 RS 17% sharpen place above element 96 to the left
Open element 73 RS 17% sharpen place above element 123 to the right NO DS
11.
Now onto our mask !
Open paper 45 RS by 750 pixels-sharpen paste as New layer make sure it is above your white layer
Load mask - I used mask 0032 by Vivienne
Merge group and RS by 95 %
If you would not like to animate -
Delete your white background layer - crop away any excess canvas - add your copyrights and save tag as PNG/JPG and then add name !
OPTIONAL:
If you would like to animate then well let’s go !!
Everyone animates differently this is how I do it but if you have another way then go your own way heehee!!
Everyone animates differently this is how I do it but if you have another way then go your own way heehee!!
In PSP
Highlight your copyright layer -
Layers - View Current Only
Then check all your elements/frames/mask under Main Tube to make them visible
Highlight your white background layer
Edit - Copy Special - Copy Merged
Open Animation Shop
Edit - Paste as New Animation
Using CTRL + L duplicate your frame until their is 25 of them ( just as the animation has 25 frames !)
Edit - Select All
Now -
Open Animation 650 from RebelDezignsAnimation-Package-216
Edit- select all
Edit - copy
edit - propagate paste
edit - propagate paste
Click back on your tag
Edit - Paste into selected frame
place where you would like
( I copy and pasted mine twice - one to the left and one to the right )
Back to PSP
Highlight Main Tube Layer - layers view current only
Then check all your elements above Main Tube also to make them visible
Edit - Copy Special - Copy Merged
Back to AS
edit paste into selected frame
And you are finished !

Sunday, September 30, 2018
Shhh PTU Tutorial

This tutorial was written by Ashley Zimmerman on 9/29/18
Any resemblance to any other tutorial is coincidental.
Any resemblance to any other tutorial is coincidental.
Supplies I Used:
PSP – I used 2018 but any version will do
Tube of Choice
Font of Choice
I used a Mask I made
Eye Candy 4- Gradient Glow
Mura's Meister - Copies
PSP – I used 2018 but any version will do
Tube of Choice
Font of Choice
I used a Mask I made
Eye Candy 4- Gradient Glow
Mura's Meister - Copies
I Used the stunning kit "Symphonic Melody" by Rebel Dezigns
I used the amazing artwork of Enys Guerrero (Individual Tube 29-1) here
You can purchase her work and a license from CDO
You must have a license to use Enys's Work.

Open element 39 resize 15% sharpen add drop shadow duplicate place over to the left refer to my tag for placement
Open element 90 resize by 40% twice and rename leaf move so it’s the very top layer Plugins - Muras Meister copies with these settings

Open element 22 Image - Flip Vertical resize by 50% sharpen add drop shadow move under element 25 to the left change your opacity to about 57 and erase what is outside the frame Open element 22 again and repeat the steps above placing to the right Open your tube and resize 70% sharpen bring to top and place to the right of frame duplicate . Blend mode screen merge down rename Top Tube Duplicate rename Bottom Tube move down under the frame - hide this layer Activate Top Tube and grab your eraser tool - erase the tube at the bottom


Open element 36 resize 50% twice sharpen add drop shadow and place in the center
Open element 53 resize 50% sharpen add drop shadow and place to the right under element 36
Open element 43 resize 50% sharpen add drop shadow and place under element 53
Open element 35 resize 50% twice sharpen add drop shadow and place between elements 53 and 43 to the left
Open element 33 Image - Free rotate - Right at 15 degrees sharpen add drop shadow and place over to the right above element 43
Open element 12 resize 40% sharpen add drop shadow place above element 43 to the right
Open element 6 Image - Free rotate - left at 15 degrees resize 77% place under element 43 to the right
Open element 4 resize by 20% sharpen add drop shadow place above element 6
Open element 105 resize by 50% twice sharpen add drop shadow place to the left between element 6 and Top Tube
Open element 101 resize by 50% twice sharpen add drop shadow place above element 43 to the right
Open element 98 resize 50% twice sharpen add drop shadow place towards the right , above top tube
Open element 94 resize 50% twice sharpen add drop shadow place to the right under element 6
Open element 95 resize 50% sharpen add drop shadow place to the left above top tube layer duplicate mirror horizontal
Open element 92 resize 50% twice sharpen add drop shadow place under elements 95 to the right duplicate mirror horizontal
Open element 91 resize by 50% twice sharpen add drop shadow move below elements 92 and position as seen on my tag duplicate mirror horizontal
Open element 77 resize by 50% send to bottom and place to the right
Open element 58 resize by 50% sharpen add drop shadow place above top tube to the left
Open element 67 Image - Free Rotate - Right at 45 degrees sharpen add drop shadow and place under element 77 move towards the right
Open element 55 resize 50% move under element 67 sharpen add drop shadow and place slightly towards the left (refer to my tag for placement )
Open element 48 resize 50% twice sharpen add drop shadow place to the left between elements 53 and 35
Open element 49 send to bottom sharpen add drop shadow
Open element 18 resize 50% twice sharpen add drop shadow place between elements 98 and 95 to the left
Open element 1 resize 70% sharpen add drop shadow send to bottom move to the right
Open word art 2 Image - Free Rotate - Left 90 degrees resize 50% send to bottom place to the left - Effects - inner bevel with these settings

Eye candy glow 4000 medium - with these settings

Listen PTU Tutorial

This tutorial was written by Ashley Zimmerman on 9/29/18
Any resemblance to any other tutorial is coincidental.
Any resemblance to any other tutorial is coincidental.
Supplies I Used:
PSP – I used 2018 but any version will do
Tube of Choice
Font of Choice
AoRK-Mask 349 by Rebel Dezigns you can get all her masks here
Eye Candy 4- Gradient Glow
VM Extravaganza- Transmission
PSP – I used 2018 but any version will do
Tube of Choice
Font of Choice
AoRK-Mask 349 by Rebel Dezigns you can get all her masks here
Eye Candy 4- Gradient Glow
VM Extravaganza- Transmission
I used the amazing artwork of Enys Guerrero (Individual Tube 17-1) here
You can purchase her work and a license from CDO
You must have a license to use Enys's Work.


Open element 83 resize 40% sharpen add drop shadow move below element 74
Open element 71 resize 40% sharpen add drop shadow move between elements 74 and 83 move towards the left and erase the part sticking out from the right
Open element 52 resize 40% sharpen add drop shadow place to the left see my tag for reference
Open element 53 flip horizontal resize 50% twice sharpen add drop shadow and move under element 52 place to the right
Open element 44 resize 50% twice sharpen add drop shadow and place above element 74
Open element 8 bring to top resize 50% twice sharpen add drop shadow place on the right top side of frame
Open element 12 resize 50% twice sharpen add drop shadow place between elements 74 and 71
Open element 29 resize by 50% sharpen add drop shadow and place to the left Open element 116 resize by 50% sharpen add drop shadow place under element 29 to the right
Open element 107 resize by 50% twice sharpen add drop shadow send to bottom move over to the left
Open element 106 Image - Free Rotate , Left at 45 degrees move above element 29 place to the left sharpen add drop shadow
Open element 93 resize by 50% twice sharpen add drop shadow place above frame towards the bottom to the left
Open element 78 resize by 50% twice sharpen add drop shadow place above frame slightly to the right
Open element 70 resize by 50% sharpen (I didn’t add drop shadow on this element) send to bottom place as seen on my tag
Open element 62 resize by 20% sharpen ( I didn’t add drop shadow on this element) place above element 78 to the right
Open element 43 resize by 20% sharpen add drop shadow place above element 78
Open element 42 resize by 50% twice sharpen add drop shadow place under element 29 to the left
Open element 28 resize 50% twice sharpen add drop shadow place above element 44
Open element 3 resize 50% twice sharpen add drop shadow place under element 44
Open word art 3 resize 50% twice sharpen add eye candy glow 4000
With these settings add drop shadow and place under element 3 towards the right

Antique Harmony PTU Tutorial

This tutorial was written by Ashley Zimmerman on 9/29/18
Any resemblance to any other tutorial is coincidental.
Any resemblance to any other tutorial is coincidental.
Supplies I Used:
PSP – I used 2018 but any version will do
Tube of Choice
Font of Choice
AoRK-Mask 502 & 450 by Rebel Dezigns you can get all her masks here
Eye Candy 4- Gradient Glow
PSP – I used 2018 but any version will do
Tube of Choice
Font of Choice
AoRK-Mask 502 & 450 by Rebel Dezigns you can get all her masks here
Eye Candy 4- Gradient Glow
I Used 2 Kits in this tag "Melodic Symphony" & "Symphonic Melody" by Rebel Dezigns
-Melodic Symphony here
-Symphonic Melody here
-Melodic Symphony here
-Symphonic Melody here
I used the amazing artwork of Enys Guerrero (Individual Tube 9-3) here
You can purchase her work and a license from CDO
You must have a license to use Enys's Work.
You can purchase her work and a license from CDO
You must have a license to use Enys's Work.
NOTE: I will tell you which kit I am in and out of as we go along ! Its kind of a tough tutorial as I am going back and forth between two kits !
Lets Begin!!
Open a new canvas 750x750
From Symphonic Melody kit
Open frame 6 : Image - Free Rotate - Rotate right 90 degrees
Then adjust - sharpen and resize 80%
Rename “Middle Frame”
Open frame 15 - image - resize to 50% sharpen and place to the right side of Middle Frame - rename “right frame”
Duplicate frame 15 -
Image - Mirror Horizontal rename “left frame”
Activate Middle Frame in your Layers Pallet Grab your Magic Wand and select inside each section of the circle (3 selections )
Now activate Left Frame and hit DELETE , activate Right Frame and hit delete

Open paper 24 - Image - Resize by 400 pixels - sharpen - copy and Paste As New Layer and move under Right Frame
Using your selection tool, freehand, draw above the frame. Keep your paper layer
highlighted, go to 'Selections' on your menu bar - Invert - and then hit the delete key. Selections - Select None.
REPEAT for Left Frame


Open your tube (Raster 3) copy and Paste As New Layer move under middle frame - duplicate your tube
Adjust , blur , Gaussian blur radius set to 5 , blend mode - overlay - reduce your opacity to about 81% - merge down add drop shadow I used
V: 4 H:3 Opacity : 70 and Blur : 7
Now with your selection tool select the part of your tube you want above your frame
Selections, Promote Selection to layer
On the original, press delete Selections, None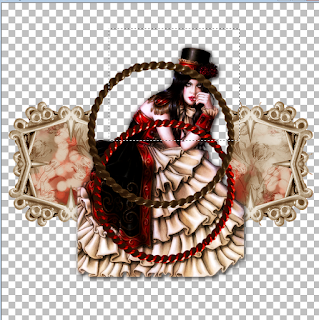

Move the promoted selection to the top of the layer palette
Layers, Arrange, Bring to Top
Erase any of the original tube layer you can see below the frame and also in the first section of the frame

Activate Middle frame on your layer pallet
Grab your magic wand and again click in the 3 sections of the frame
Selections , modify , expand by 5
Now using Melodic Symphony kit open paper 18 resize by 500 pixels sharpen copy and Paste As New Layer - move down under all the other layers
Selections , invert , delete
Selections select none
Duplicate paper - now adjust - blur- Gaussian blur same settings as above - blend mode - soft light
On Middle Frame add drop shadow same as above
Open your tube (Raster 2) copy and paste as New layer move under right frame using the same selection method (Freehand as above draw around your right frame ) selections , invert delete , change your blend mode to overlay
REPEAT this step for the left frame BUT flip your tube horizontal
Now Add drop shadow to Left and Right Frame
For all elements placed we will be using the same drop shadow ( V: 4 H:3 Opacity : 70 and blur 7 ) and resizing elements at 50 % . I will note if I change it as I go through my tag
Element from Symphonic Melody
Open element 2 Image , resize , sharpen and add drop shadow send to bottom and move to the right between Middle and Right Frame
Elements from Melodic Symphony
Open element 11 resize , sharpen , add drop shadow and move to the right of element 2
Open element 13 resize , sharpen , add drop shadow and move to the left of elements 2 and 11
Open element 10 resize by 50% BUT do it two times ! Sharpen , add drop shadow and place above Right Frame
Open element 6 resize , sharpen move under Middle Frame - Image , Free Rotate , Left at 45 degrees
duplicate - adjust , blur , Gaussian blur same settings - blend mode soft light - merge down reduce the opacity to about 46 %
Open element 24 resize , sharpen move under Middle Frame - Image , Free Rotate, Right at 45 degrees and place to the right side as seen below (erase any parts that are visible outside the circle or over to the left
Open element 34 RESIZE at 75% sharpen and move below elements 6 and 24 place to the left to fill in the remaining section of the middle frame - blend mode darken - erase any parts sticking out from frame
Open element 106 resize to 50% - Image , Free Rotate , Left at 45%
Open element 106 again resize to 50% - Image , Free Rotate , Right at 90 %
Open Element 106 resize by 50% twice and duplicate so you have 3 in total and place as seen below
Merge down all of your 106’s and add drop shadow BUT this time use
V: -1 , H: -1
This is filling the other blank section to the left side of our frames
Elements from Symphonic Melody you can use my tag as reference on where to place elements!
Element 36 resize to 40%
Element 49 send to bottom place to the left , sharpen add drop shadow duplicate - Image , mirror horizontal
Element 77 send to bottom resize to 40% place to the right to fill in between the frame and piano - sharpen add drop shadow duplicate flip horizontal
Elements from Melodic Symphony
Element 21 resize 45% do this twice Sharpen and add drop shadow
Element 22 resize 45% do this twice
Sharpen add drop shadow
Element 59 resize 45% do this twice sharpen add drop shadow
Element 65 resize 45% sharpen add drop shadow
Element 68 resize 45 % sharpen add drop shadow duplicate move slightly to the left of original element
Element 84 resize 50% sharpen add drop shadow
Element 108 resize 50% twice sharpen add drop shadow
Elements from Symphonic Melody
Element 14 resize 50% twice sharpen add drop shadow
Element 18 resize 50% twice sharpen add drop shadow
Element 37 resize 50% twice sharpen add drop shadow
Element 50 resize 50% twice sharpen add drop shadow
Element 53 resize 50% sharpen add drop shadow
Element 58 resize 45% sharpen add drop shadow
Element 78 resize 50% twice sharpen add drop shadow place to the left duplicate - Image , mirror horizontal
Element 91 resize 50% twice sharpen add drop shadow place to the right duplicate and place over to the left where you would like
Element 94 resize 50% twice sharpen add drop shadow
Element 105 resize 50% twice sharpen add drop shadow
Element 106 resize 50% twice sharpen add drop shadow
Element 115 resize 50% twice sharpen add drop shadow
Element 112 resize 50% sharpen add drop shadow send to bottom place over to the left
Open word art 1 resize 50 % twice sharpen add drop shadow and place to the right like mine
Open word art 5 resize 50% twice add eye candy glow 4000 style medium and with these settings

From Melodic Symphony
open paper 22 sharpen copy and paste as New layer - Layers load mask AoRK-Mask 502 merge group and resize 95%
open paper 21 sharpen copy and paste as New layer place above other mask layer apply mask AoRK-Mask 450 merge group resize to 93 %
Crop away any excess canvas
Add copyrights and save ! And add your names !
Subscribe to:
Posts
(Atom)
My CT's


